Create custom hat mockups with Mayzing and AI tools
February 12, 2026
Tips & tricks


We’ve launched a new range of hats, and you can now create high-quality custom mockups using AI in just a few minutes.
Step 1: Create your hat on Mayzing
- Set up the hat product as usual.
- Add your design to the front of the hat.
- Generate the product preview.
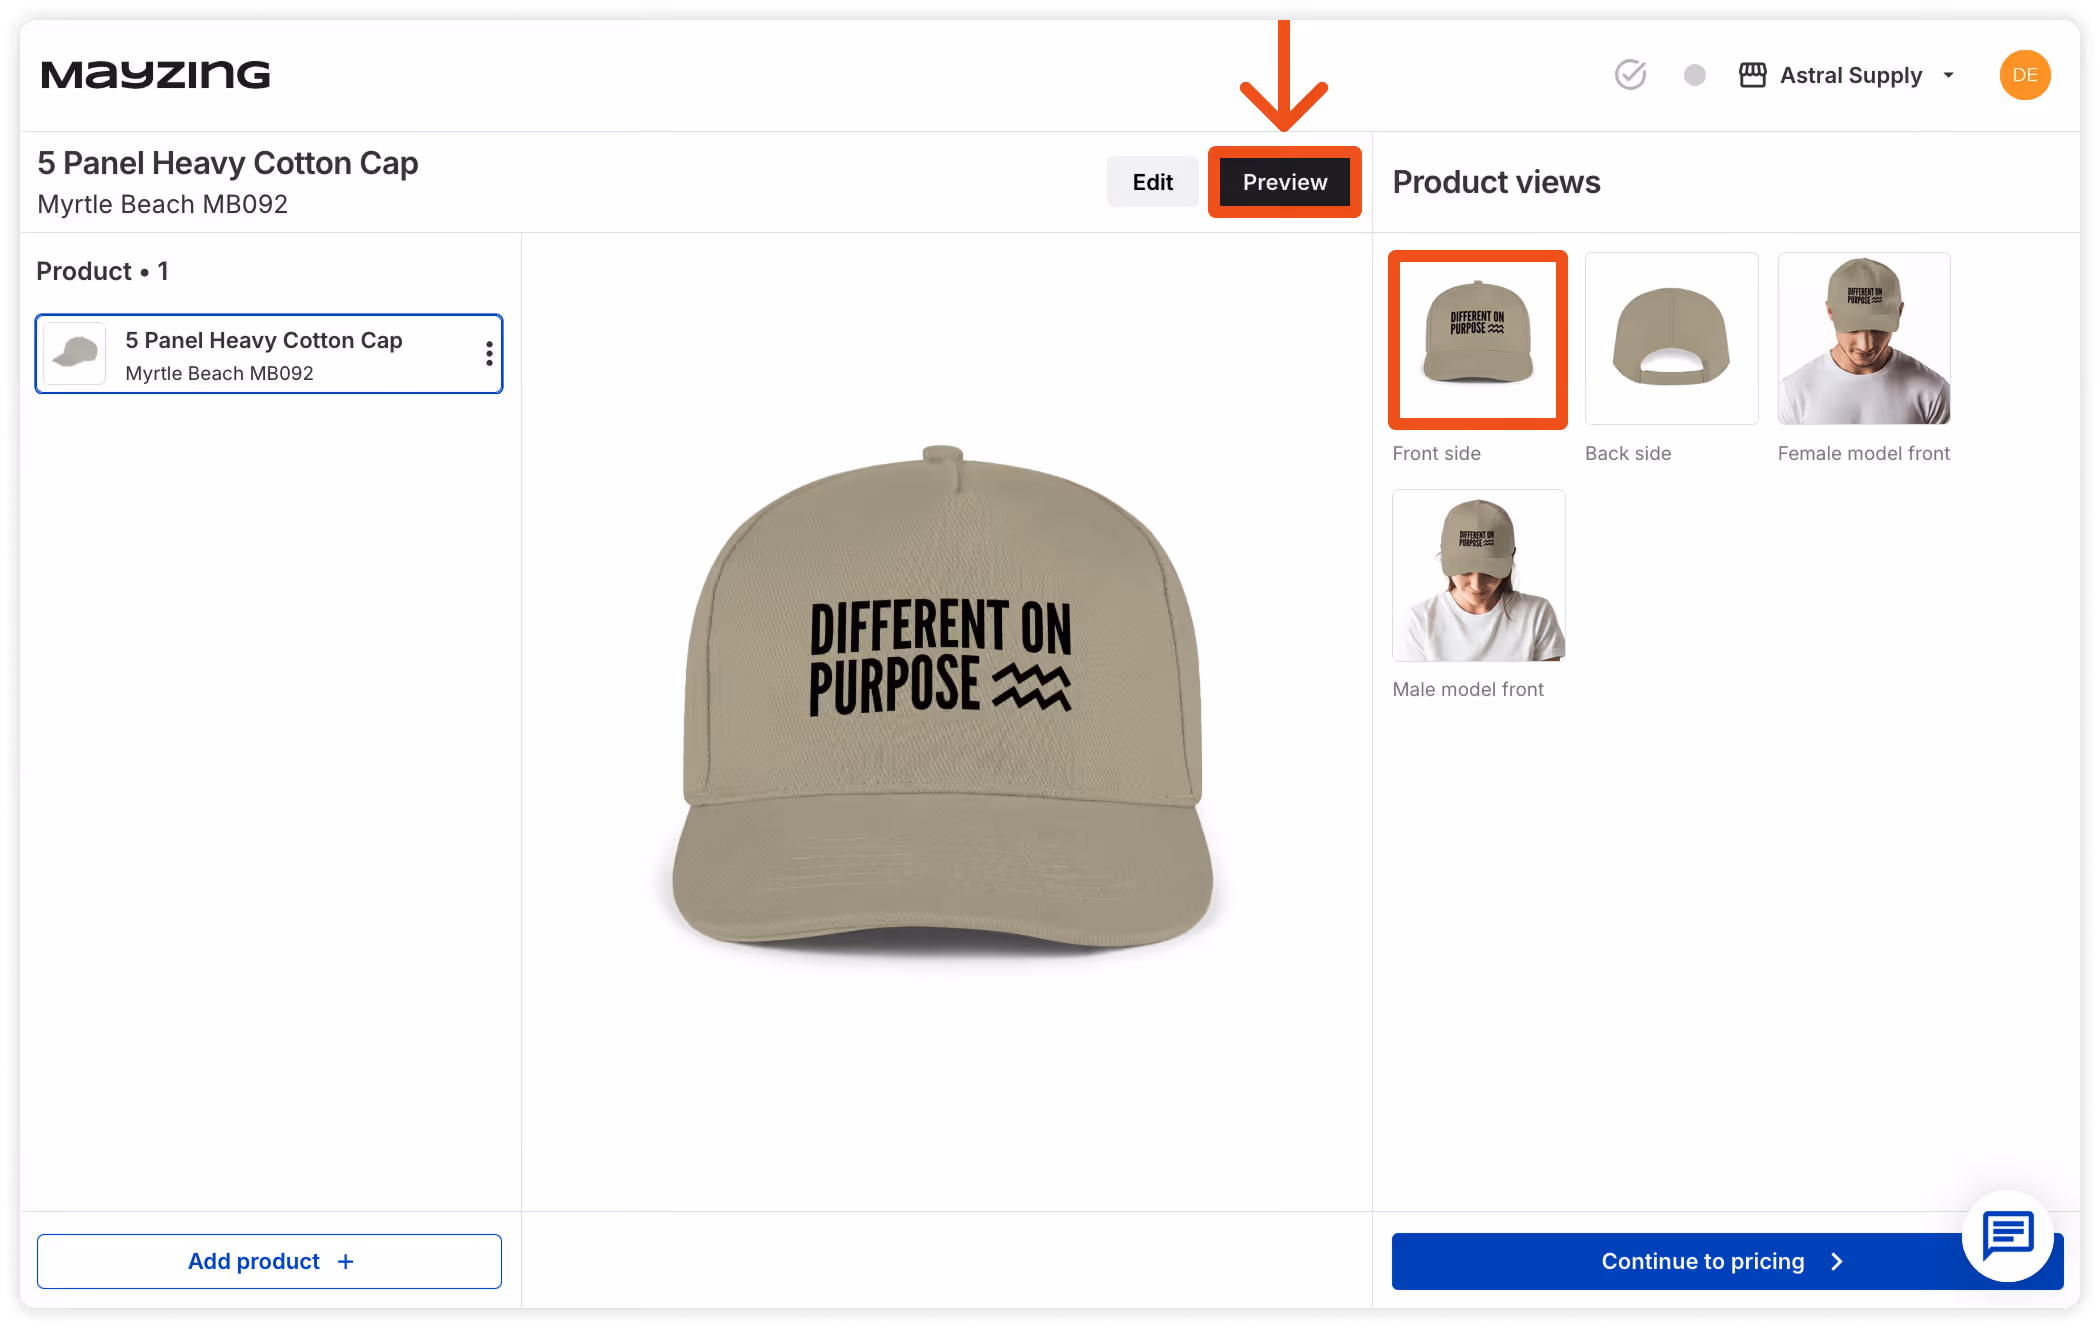
Step 2: Download the front view
- Select the front on image of the hat.
- Right click on the image and select 'Save as' to download it.
- This image will be your reference image for AI.

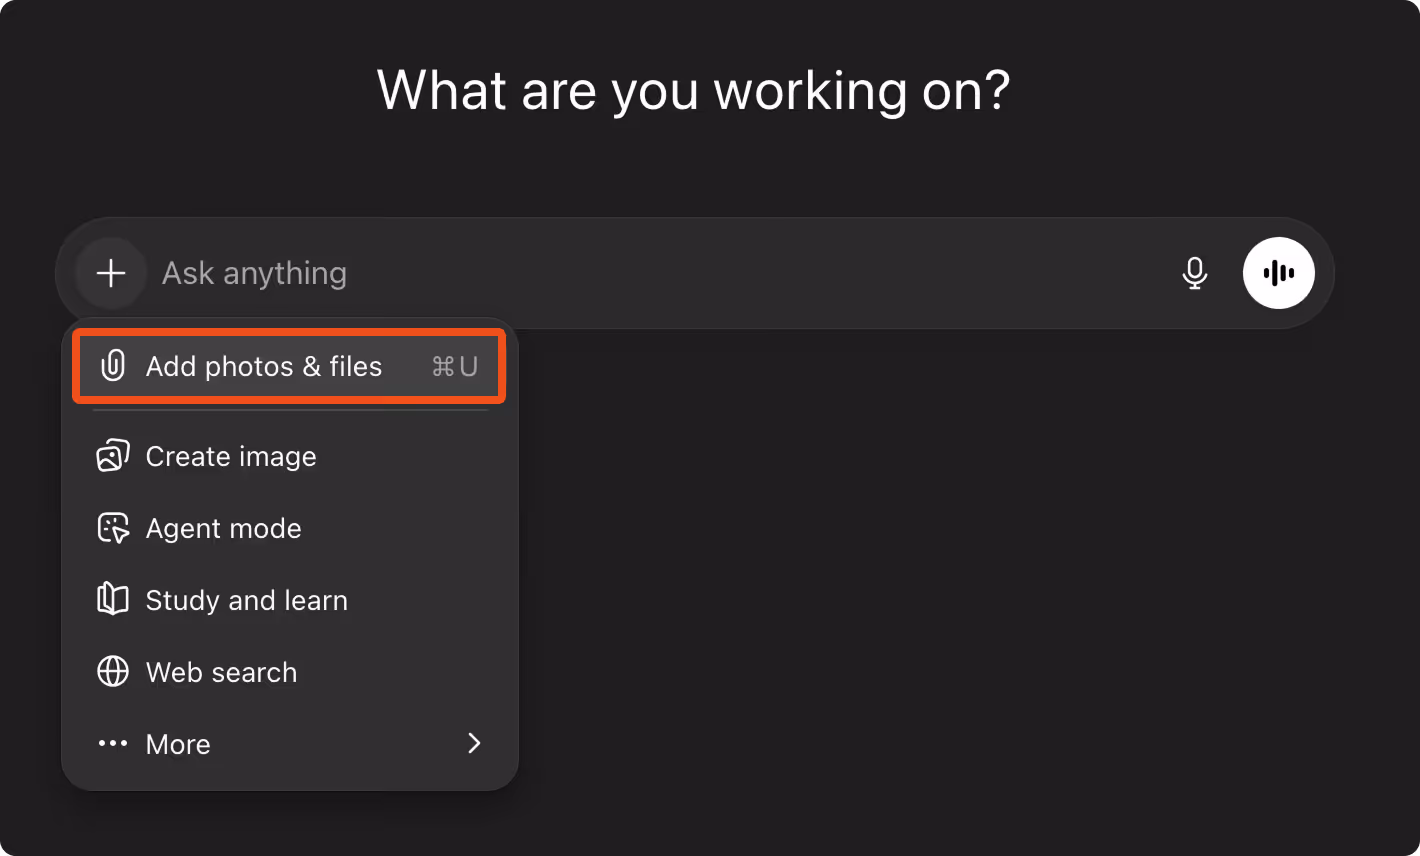
Step 3: Upload to your AI tool
- Upload the downloaded hat image to your AI image generator of choice.
- In this example we are using ChatGPT.
Step 4: Use the prompt below
- Copy, paste, and fill in the blanks as needed.
- Once filled in, hit enter and wait for the image to be generated.
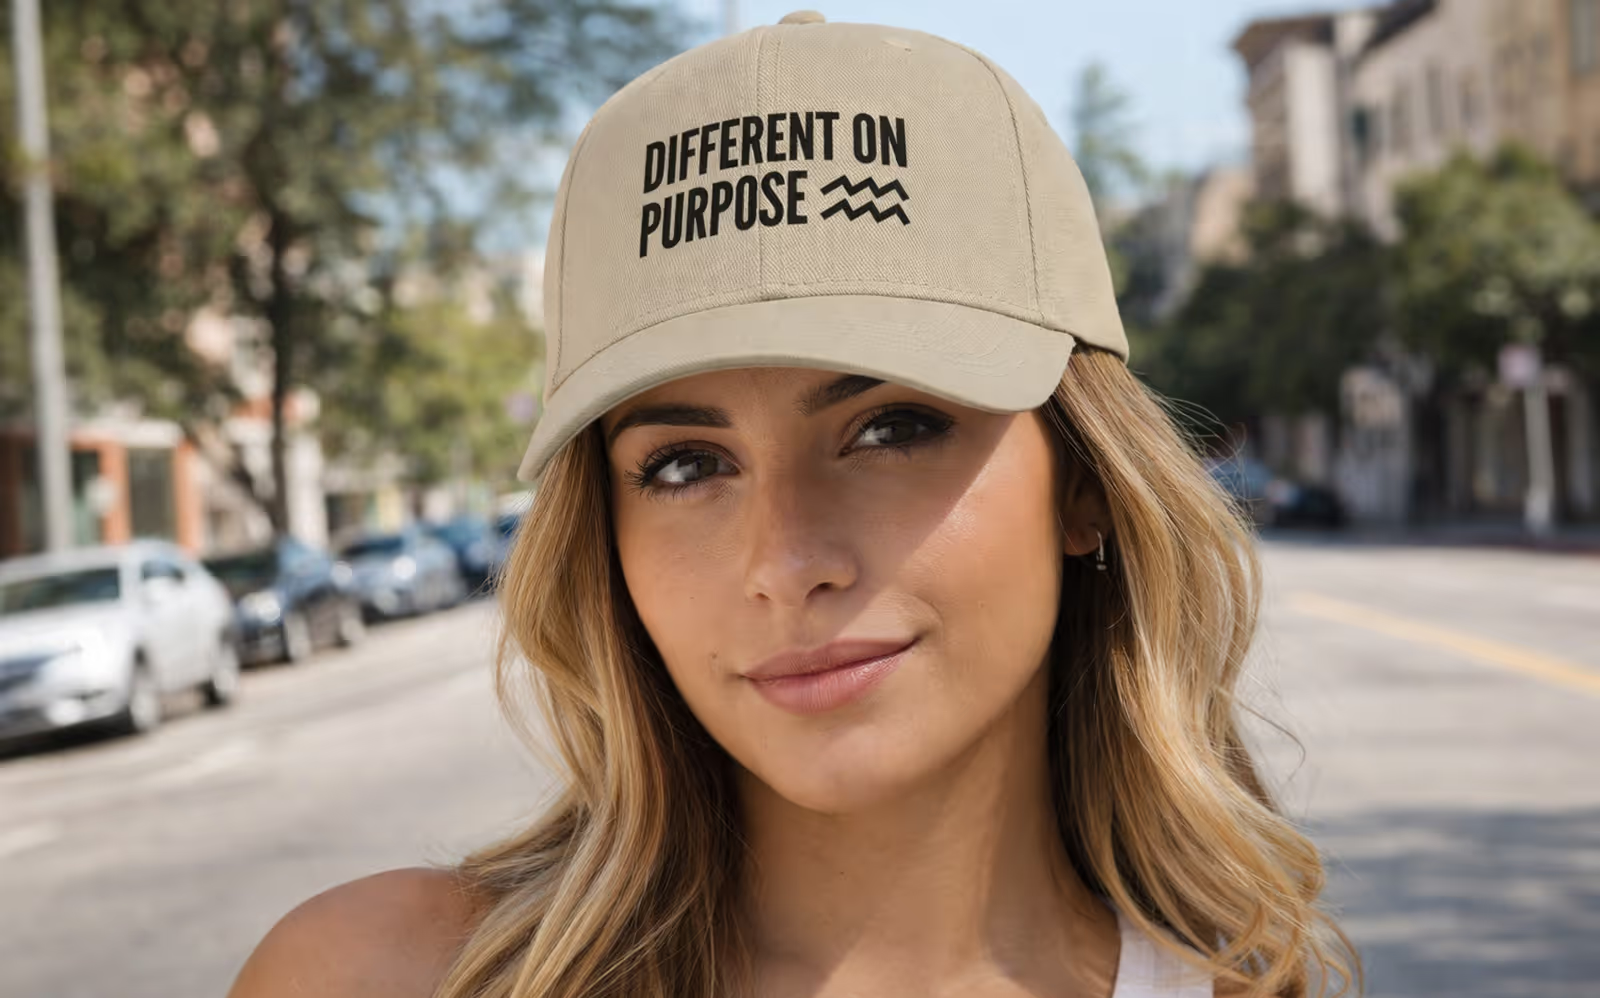
Make a realistic product mockup of a hat.
Use the hat photo I uploaded as the exact product.
Put my artwork onto the front of the hat.
IMPORTANT RULES:
- Do not change the hat shape, color, or style.
- Do not change my artwork in any way.
- Do not stretch, crop, or redraw the artwork.
- Make the artwork look like it is really printed on the hat.
- Follow the curves of the hat naturally.
MODEL:
- Model gender:
- Model skin tone:
- Model age range:
- Face visible? (yes / no):
- Background (studio, indoor, outdoor):
LIGHTING:
- Clean, natural lighting like a real product photo.
- No dramatic shadows.
FINAL IMAGE MUST:
- Look like a real ecommerce product photo
- Be clean and professional
- Have no extra text, logos, or watermarks
- Show the hat clearly from the front
- Square image formatPro tip: Experiment by adding more details. For example you can set a pose for the model, eg: 'model pose: one hand touching brim of cap.' Or set a specific hairstyle, eg 'model hair: blonde highlights.'
Step 5: Upscale your image to 1500 × 1500 px (using free tools)
Once your AI mockup is generated, it’s important to upscale it so it is compatible with Mayzing.
- Download your final AI-generated image.
- Open a free online image upscaler, for example Image Resizer
- Set the final size to exactly 1500 × 1500 pixels.
- Apply the upscale and download the enhanced image.

Step 6: Upload your image to your Mayzing Campaign
You are now ready to add your mockup to your Mayzing Campaign
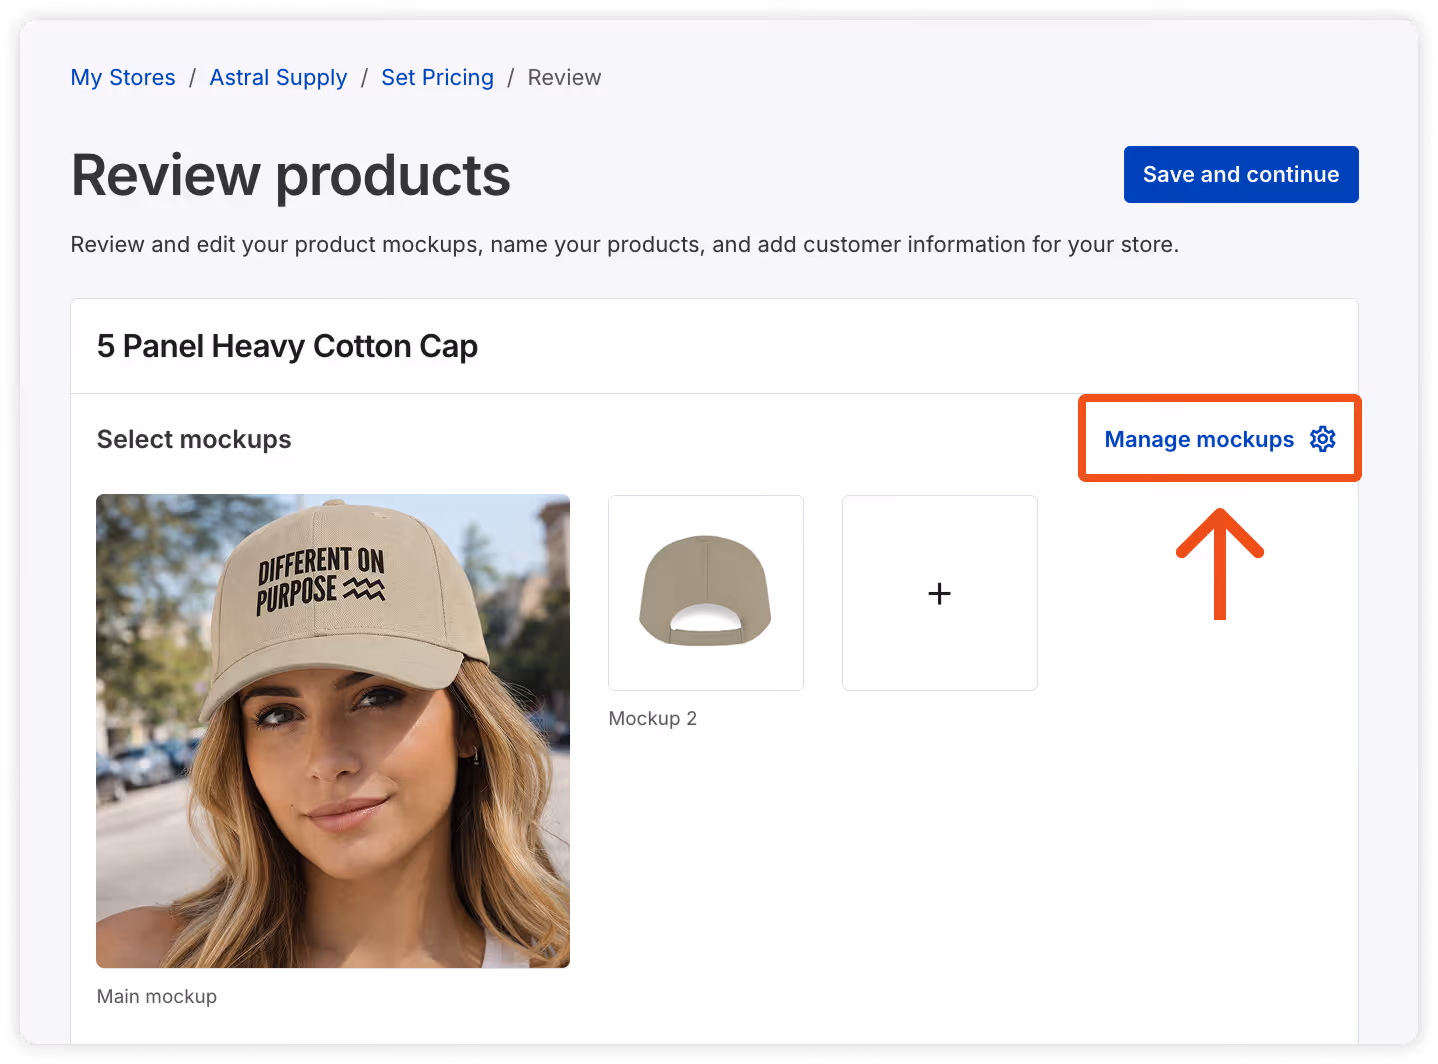
- Navigate to the Review Products page for the Campaign
- Click the 'Manage mockups' button
- Click 'Upload image' and follow the instructions
You can now set your custom mockup as the main product image, or simply use it as one of the product images in your Campaign.